SendToSign: Request Signatures
Request signatures from up to 20 recipients and receive legally-binding signatures without leaving Dynamics 365 using SendToSign.
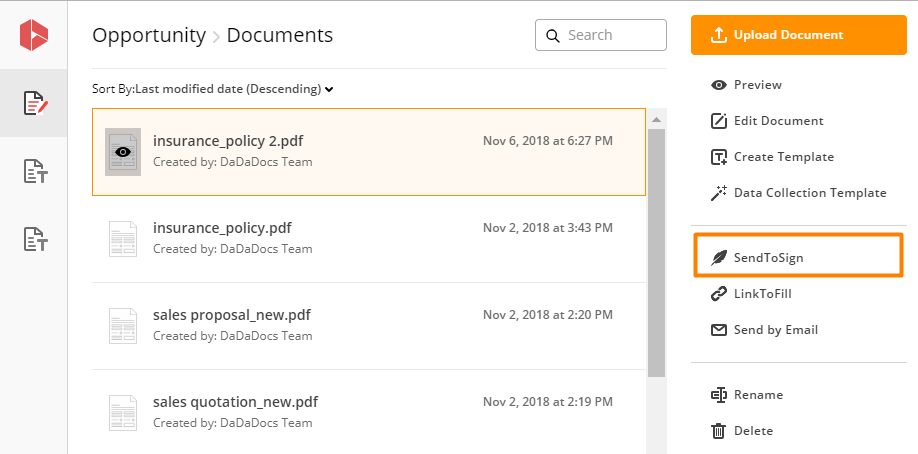
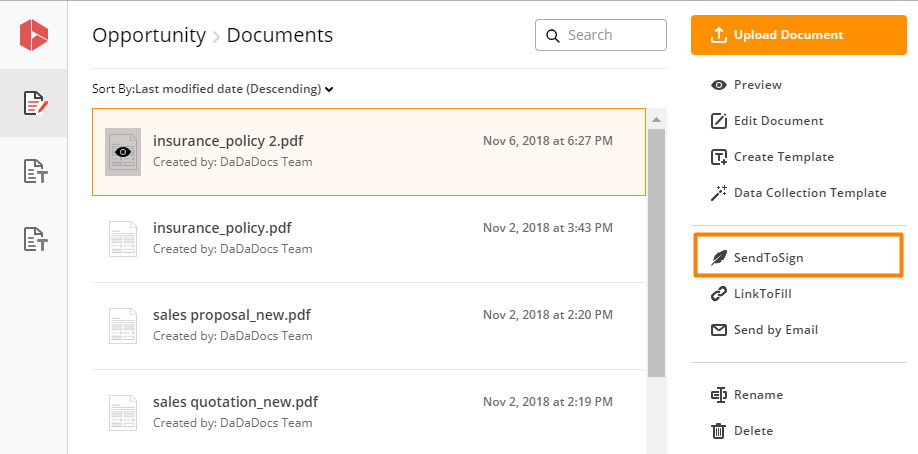
In the DaDaDocs Documents tab select a document from the list and click SendToSign.
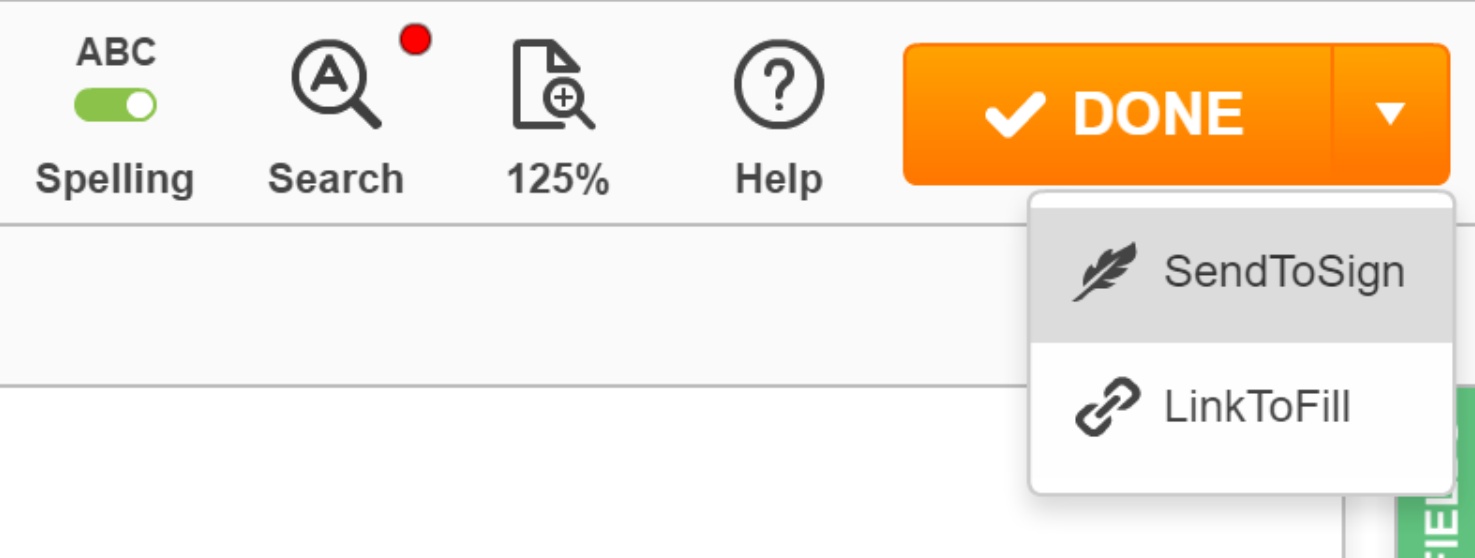
Alternatively, select SendToSign from the DONE dropdown menu to the upper right while editing your document.
Select Your SendToSign Method. There are two options for requesting digital signatures: SendToEach and SendToGroup.
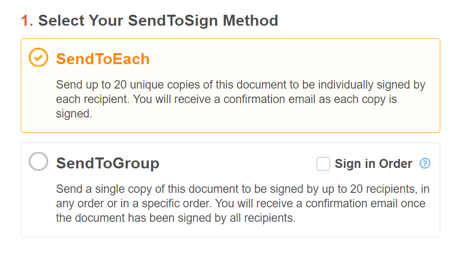
SendToEach. Send up to twenty unique copies of a document to be signed by each recipient individually. You will receive a confirmation email as each copy is signed.
SendToGroup. Send a single copy of a document to up to twenty people. Once all the recipients have signed the document, you will receive a confirmation email.
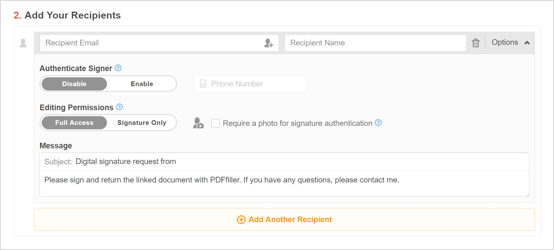
To create your signature request, add the email addresses and names of the recipients.
Signer Authentication
If you choose to enable the option to authenticate a signer, move the slider to the right and enter the recipient’s phone number.

The recipient will get a unique passcode via text message. To open the document, the recipient will have to enter this passcode.
Editing Permissions
If you set the editing permissions to Signature Only, the recipient will only be able to sign and date the document. If you select Full Access, the recipient will also be able to edit the document using all the tools in the editor.

Request a photo for signature authentication
If you select this option, the recipient will have to prove their identity by taking a photo with their webcam before returning the signed document.

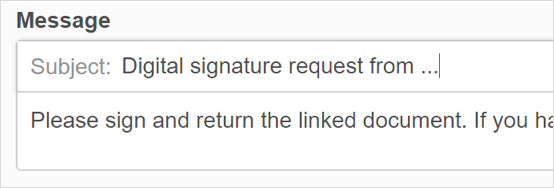
Write a message to the recipient
The recipient will receive this message along with your SendToSign signature request.
Add more recipients by clicking Add Another Recipient.

You can set individual options for each new recipient.
Add fillable fields to your document
Use this tool to modify, add or delete fillable fields. Click the Add Fillable Fields button to start the process. To save the changes click Done to the upper right. Once you add the fields, you will be returned to this screen to finish Sending out the document for signature.

If you request signatures using SendToGroup, create an envelope name to label your group. Only you will be able to see this label.

Use the Sign in Order option to set the order in which SendToGroup recipients receive their requests to sign the document. Check the Sign in Order box and then either drag or type to the left of each recipient their sequence number to set the signing order.


Add fillable fields to create a Template
Use this tool to create checkboxes and fillable fields for various types of data including text, numbers, signatures, dates and photos.
You can assign a fillable field to a particular recipient so that only this recipient will be able to fill it in. Click Create Fillable Template.
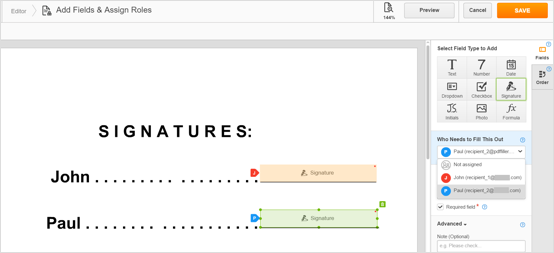
On the Add Fields and Assign Roles page, add fillable fields and assign them to recipients. Choose the field type in the right pane and click where you’d like to place the field. Then, select the recipient who will have the exclusive right to fill in the field from the dropdown list.
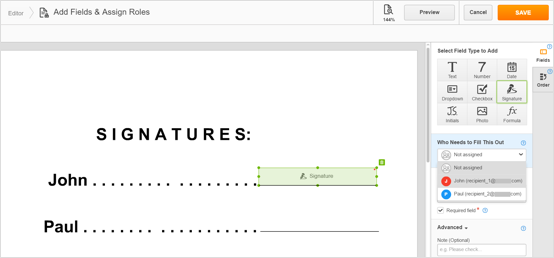
This step can be repeated for up to 20 recipients.
Click Preview on the upper right, and select a recipient from the dropdown list. You will view the document just as the selected recipient will see it.
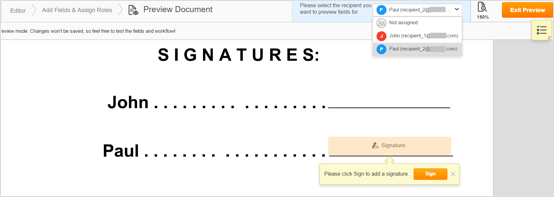
Exit the preview mode and click Save on the upper right to continue. Please note, that if you do not assign a fillable field to anyone, any recipient will be able to fill it.
Finally, click SendToSign on the lower right.
Each recipient will receive an email with your request to sign the document.
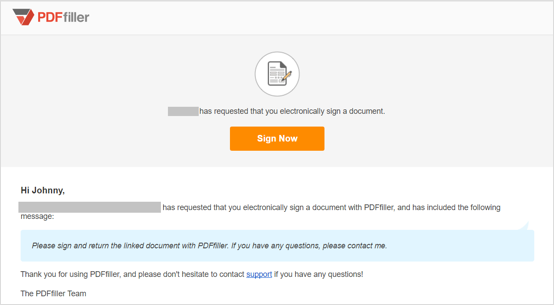
The link opens the document in the editor where the recipient will be able to sign it.
Once the document is signed, it will be automatically uploaded to your Documents tab.
Updated less than a minute ago
