Best practices
Here is an example workflow which creates a Contact record in Dynamics based on the filled-in registration form.
- Go to any Dynamics 365 record and click DaDaDocs.

- Upload a document you'd like to turn into a Data Collection Template.

- Select this document and click Data Collection Template.

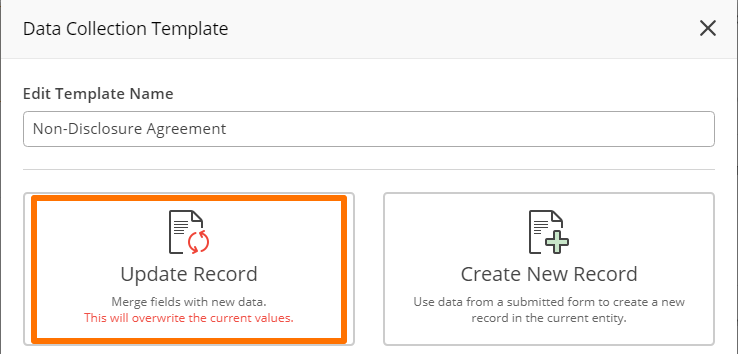
Select the purpose of your Data Collection Template: choose whether it should update or create the record.
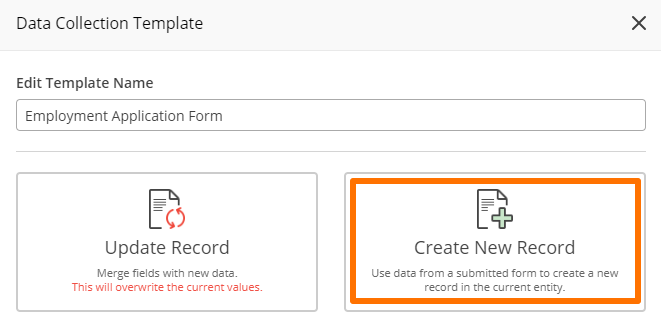
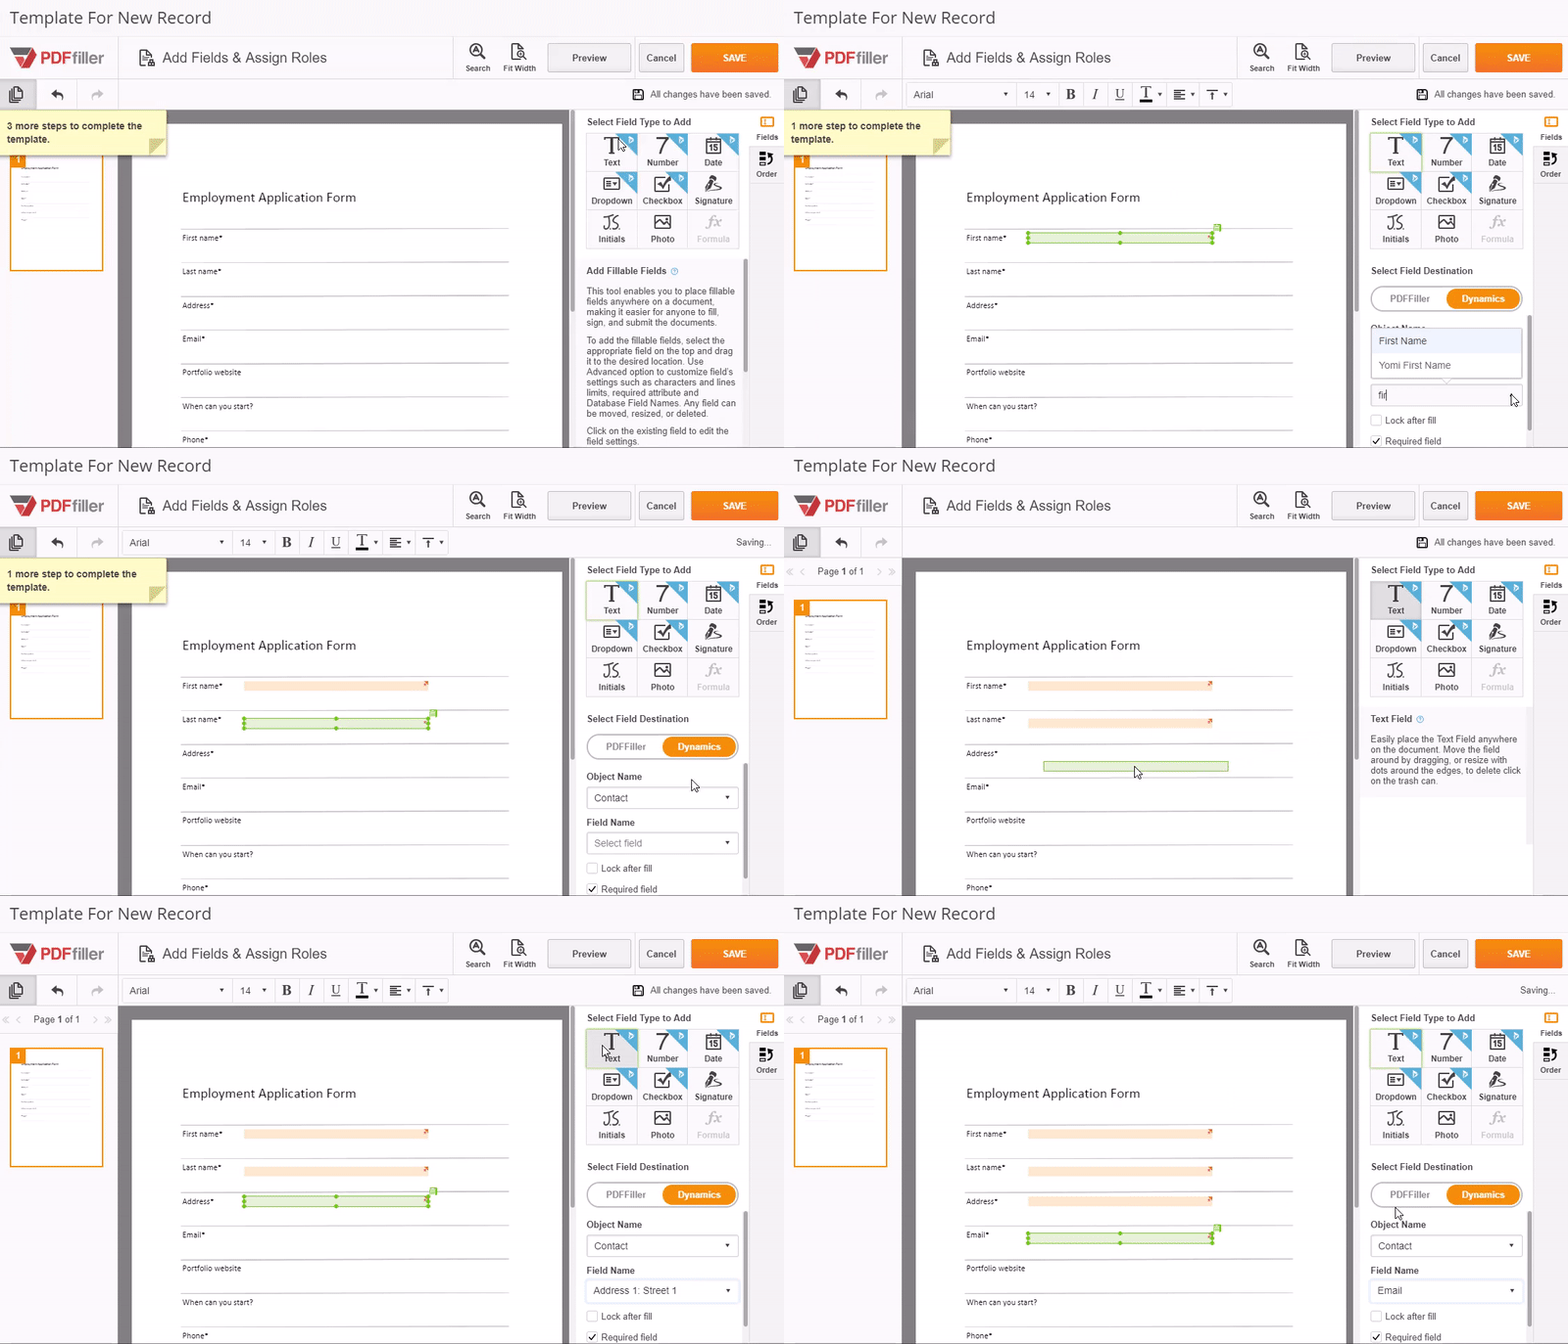
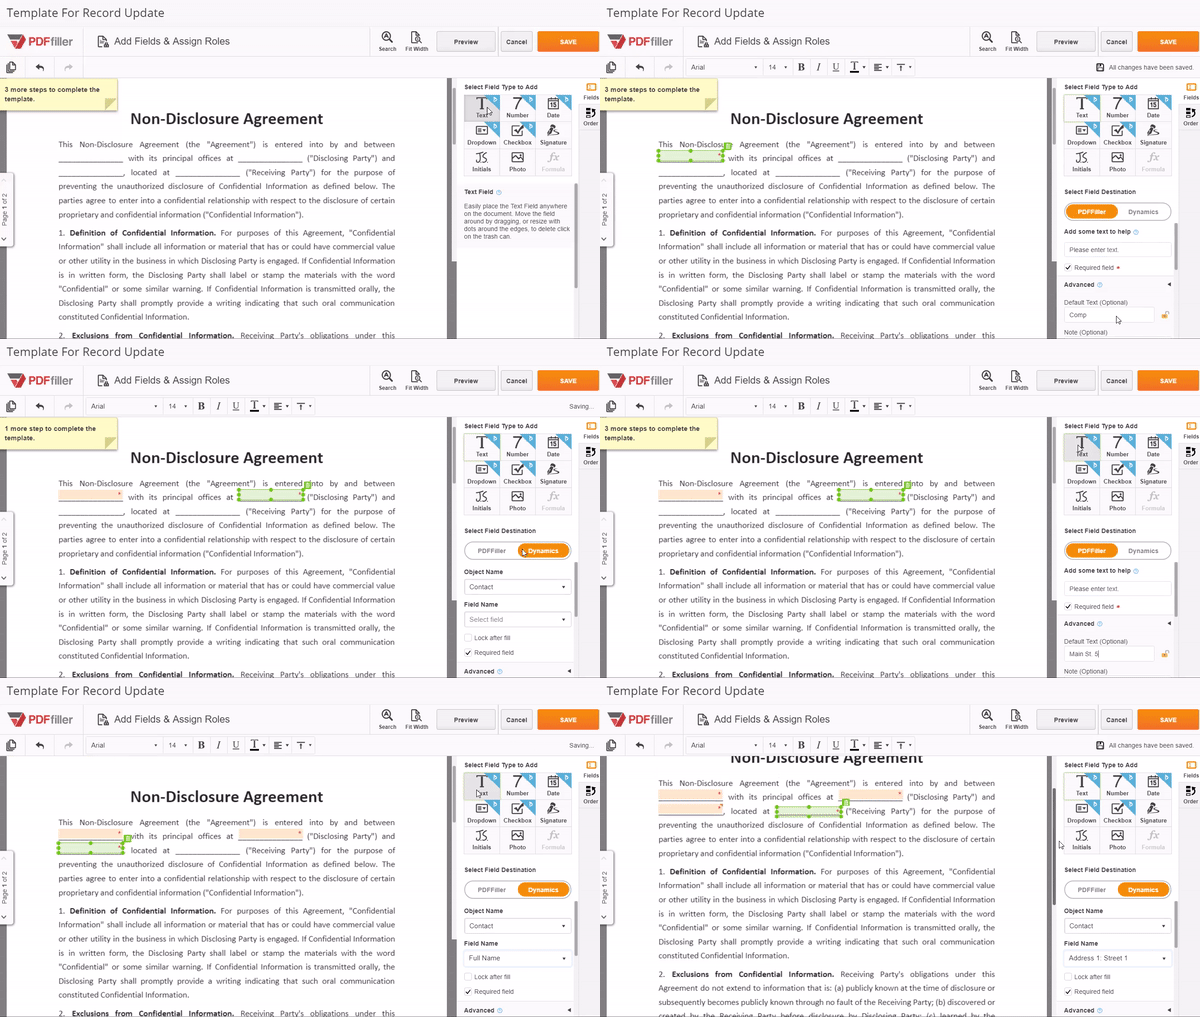
- Add fillable fields and map them with record fields. Click Save.
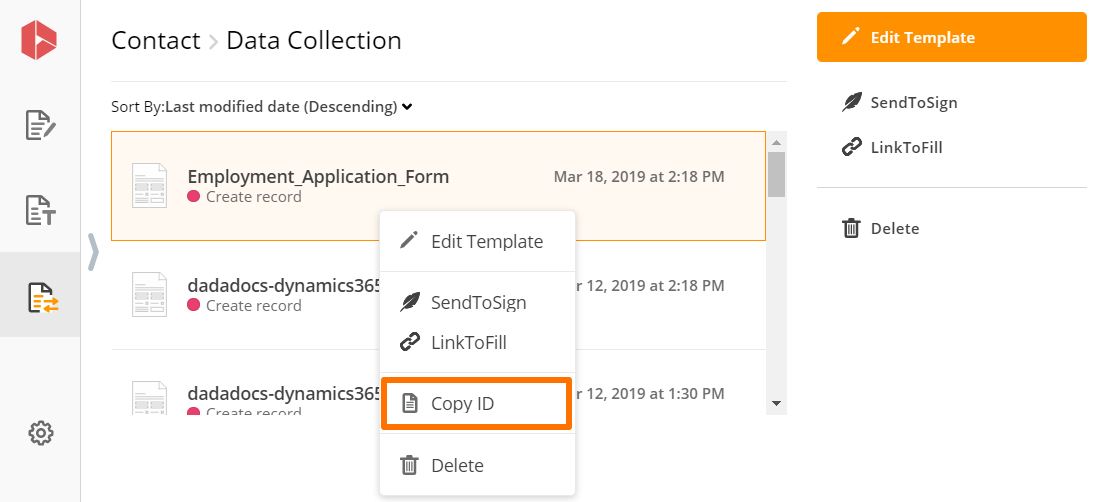
- Find your new template under Data Collection tab. Right-click on it and select Copy ID.
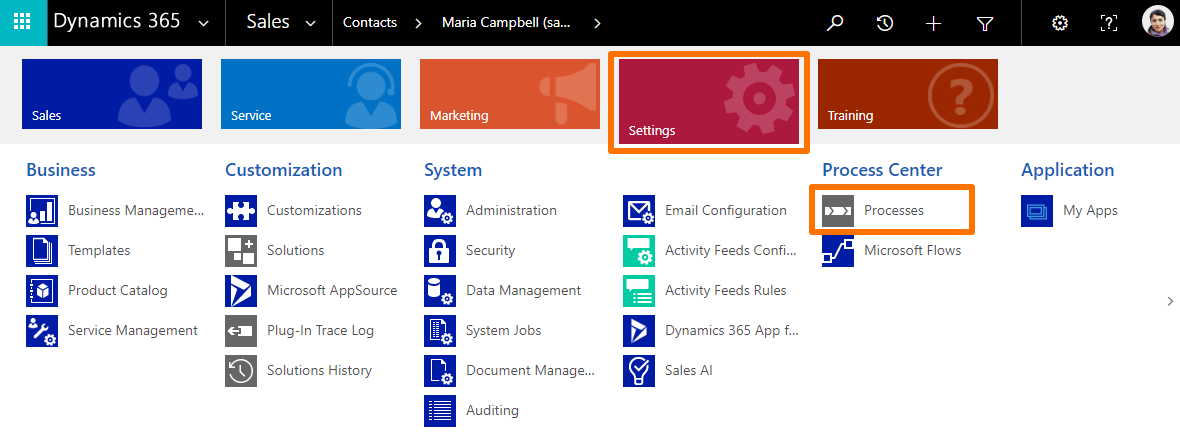
- Come back to your Dynamics record and go to Settings > Processes.
- In Processes click +New.

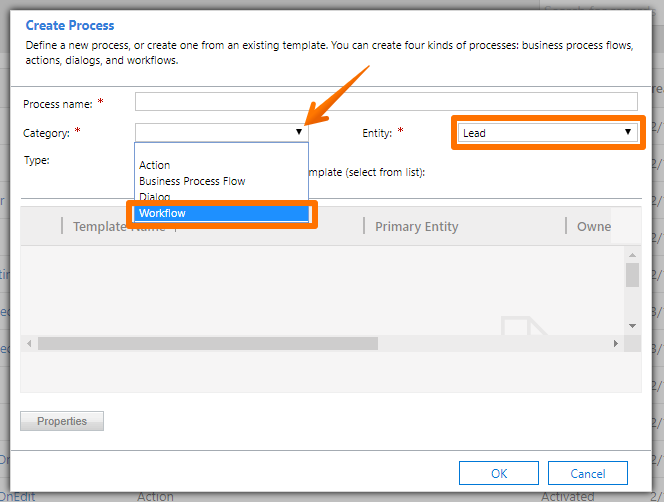
- In the Create Process window select the Category > Workflow;
in Entity - select the type of the Dynamics entity you'd like to work with.
Name your process and hit OK.
- In the new process window set the trigger that starts your workflow by checking one of the options in the Start when list.
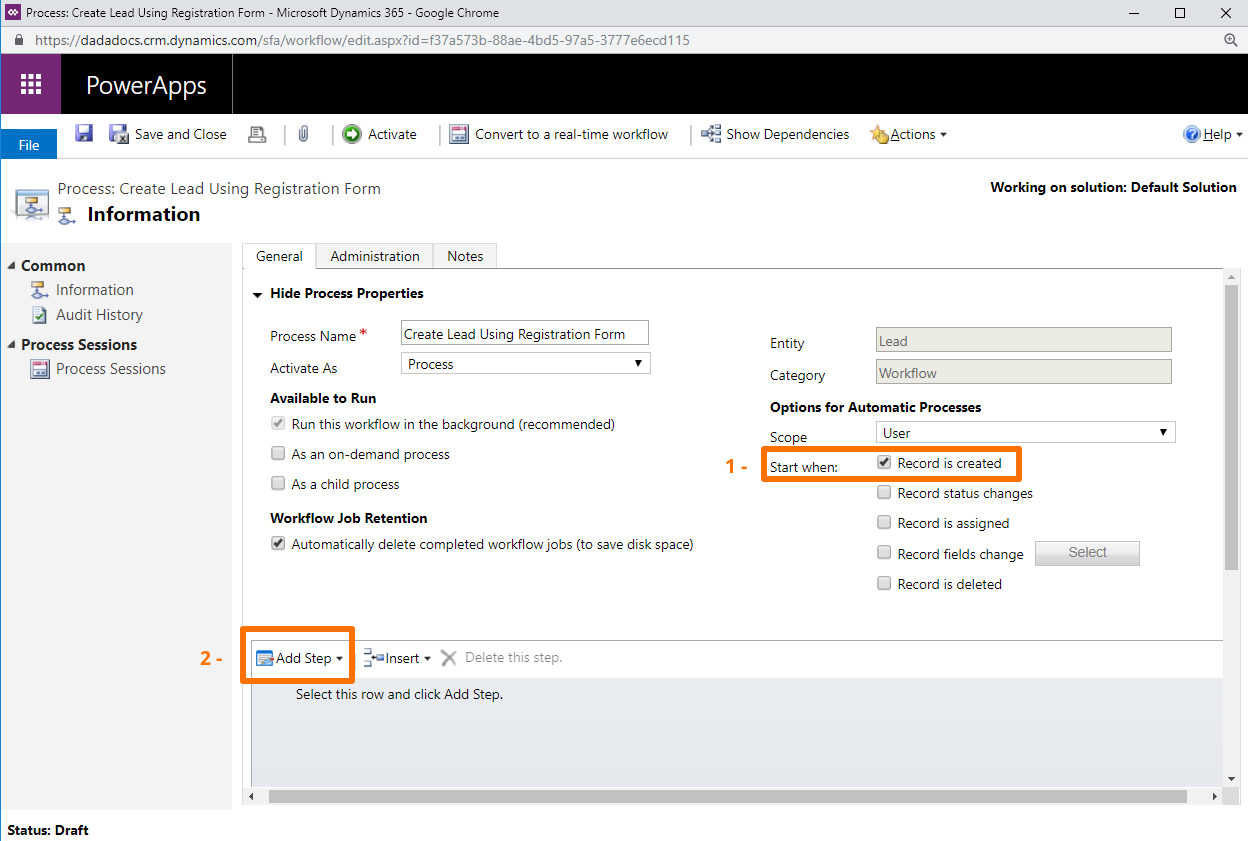
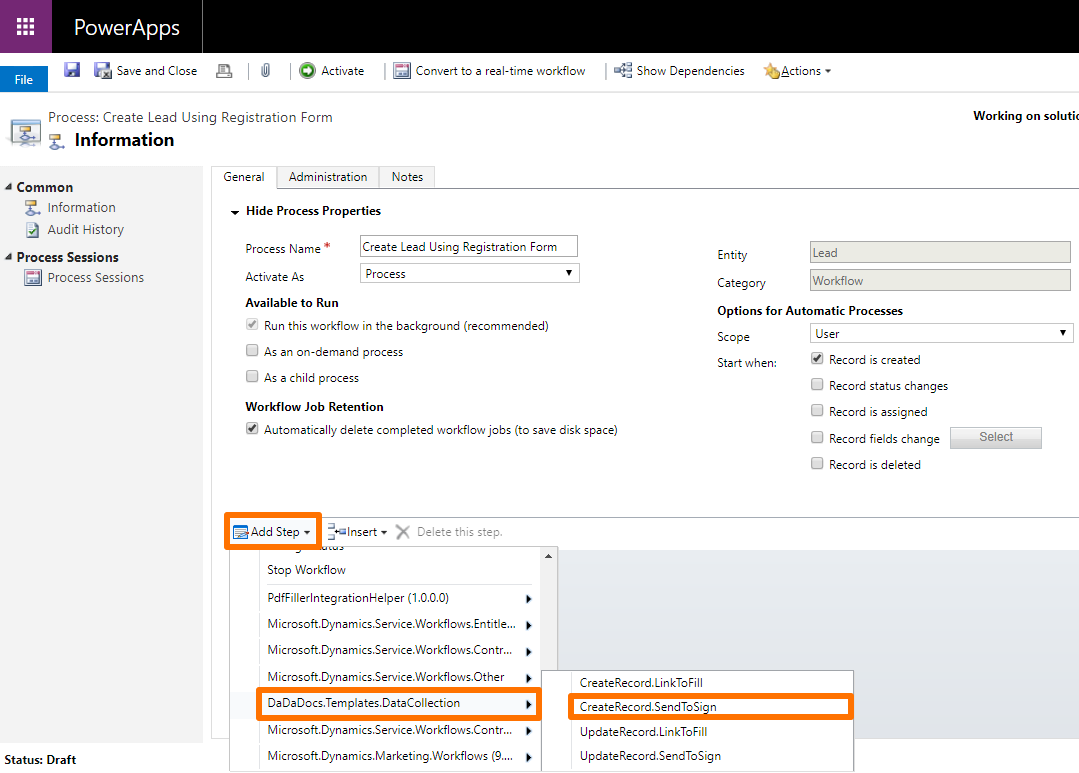
Then, go to Add steps > DaDaDocs.Templates.DateCollection > select the action for your process.
You can choose among four actions: CreateRecord.LinkToFill; CreateRecord;SendToSign; UpdateRecord.LinkToFill; Update Record.SendToSign.
In this example we select Start when Record is created and CreateRecord.SendToSign.
Type the action description and click Set Properties.

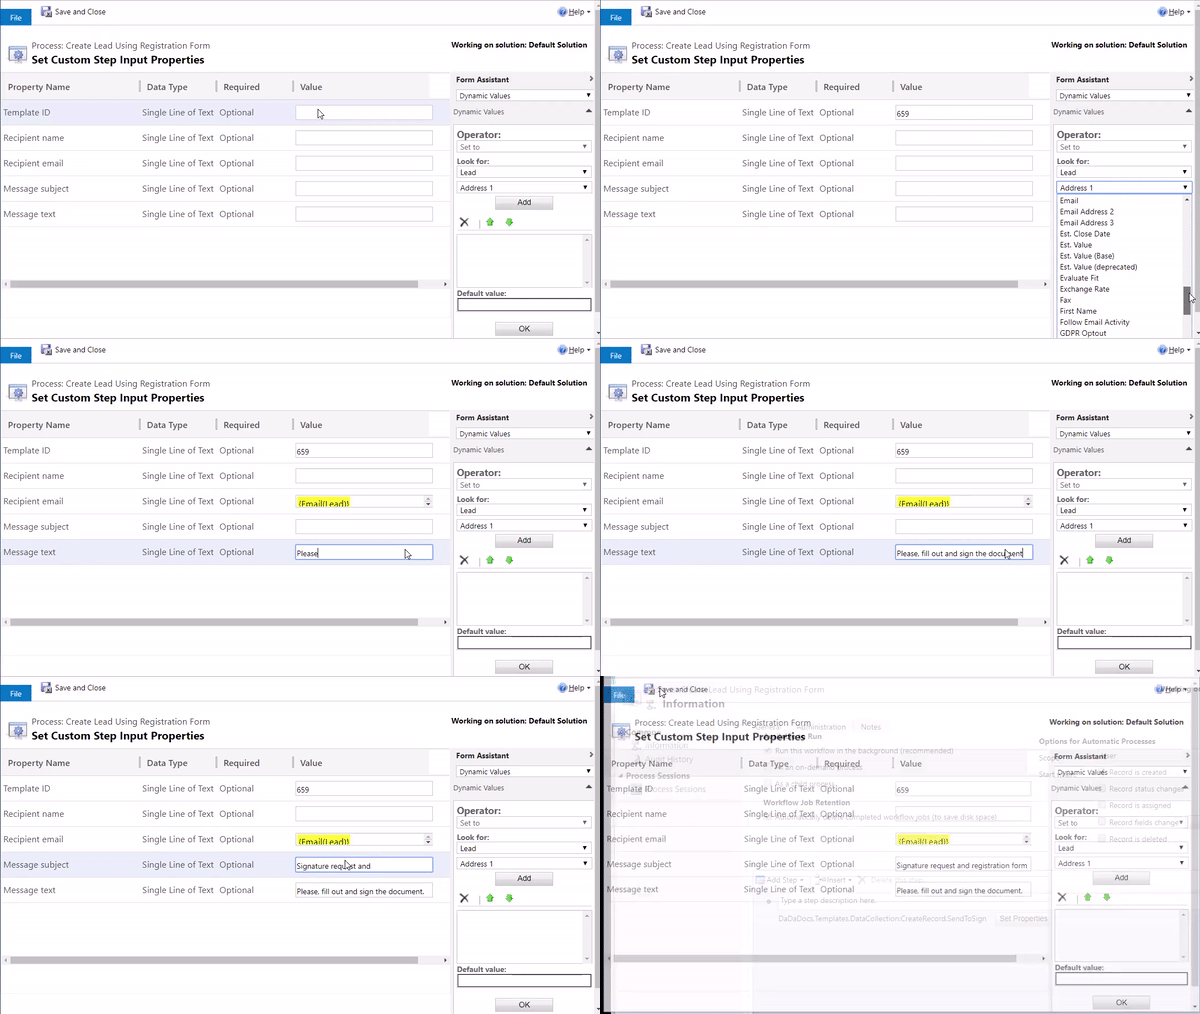
- In the Custom Properties:
-
go to the Template ID and insert the ID you copied into the value field;
-
add the Recipient name, if you want.
-
add the text tag for the recipient's email. Thus the process would be using the email address, specified in the record. Go to Operator > Look for > and select the lookup object (Lead and Email in this case). Click Add, then OK. Notice that the Recipient Email value changed into a text tag {Email(Lead)}. This allows to use the email address from the created record as the recipient's address for sending the registration form.
-
enter the Message Subject and Message Text. They will be displayed as an email subject line and body, along with the attached document sent for signature.
-
click Save and Close.
- Come back to your Process window and click Activate. In the confirmation box click Activate as well.
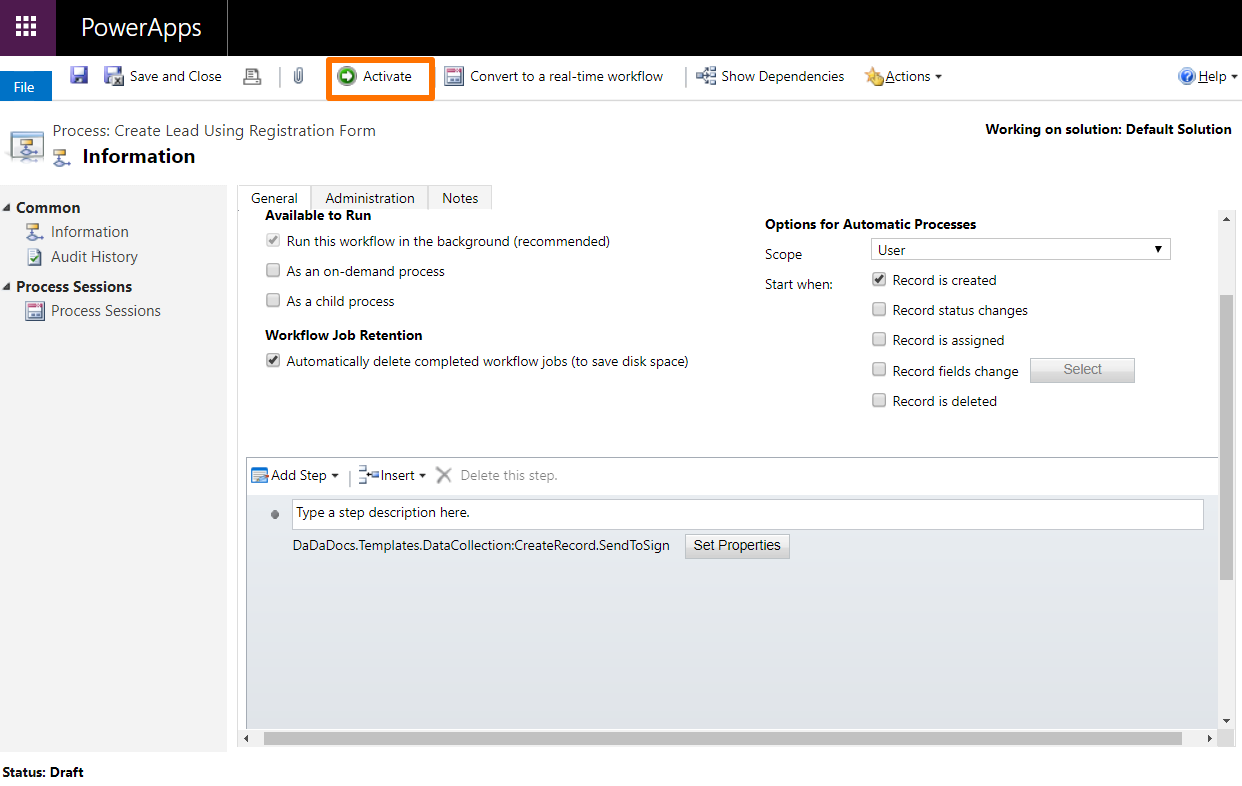
Here is an example workflow which sends an NDA automatically when a new contact is created, with the ability to update the contact record using the information from the submitted NDA.
- Upload a document to DaDaDocs.

- Click Data Collection > Update Record.
- Add fillable fields and map them with the record fields.
- Create another process using the action UpdateRecord.SendToSign.
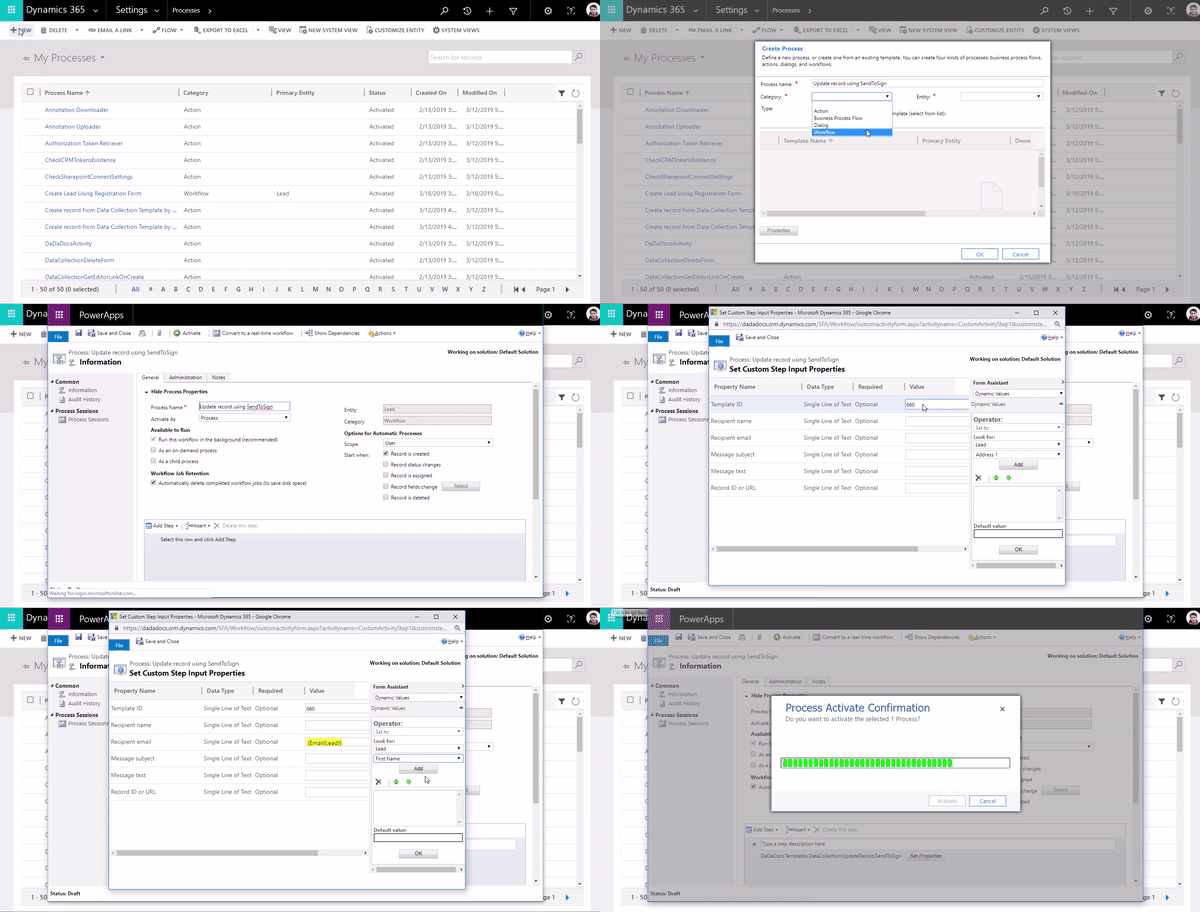
- Activate the new process.
Now,
Whenever the new contact is created:
- the employee registration form is sent to this email address;
- the form is filled-in and returns to Dynamics 365;
- the contents on the form is used to automatically create a new lead record;
- because a new lead record has been created, a prefilled NDA is sent to that email address;
- the employee signs the NDA and maybe fixes the info in the prefilled form via fillable fields;
- the correct information returns to Dynamics 365 record and as PDF attachment in the Notes section.
Updated almost 7 years ago
