Create Data Collection Template
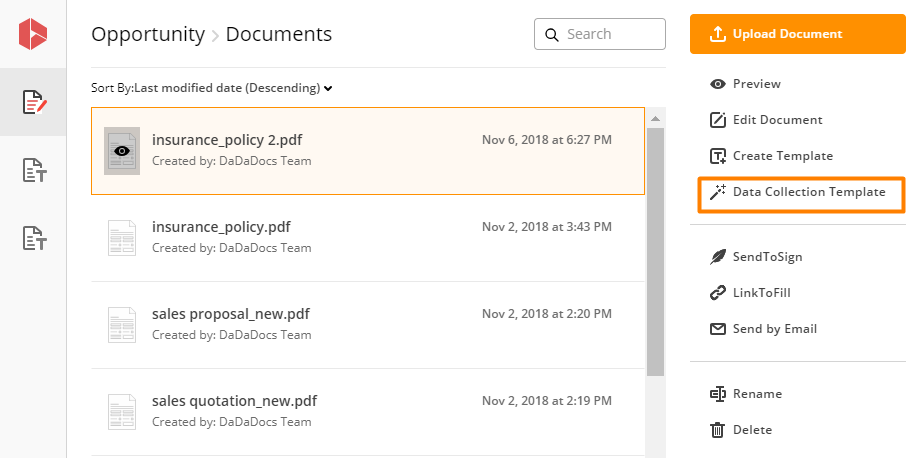
- In the Documents tab, select a document and click Data Collection Template on the right.
- Enter a name for your Data Collection Template.
- Select Update Record if you’d like to change the fields in the current record and overwrite the existing data in your object. Note that for updating existing records, a single use form will be created.
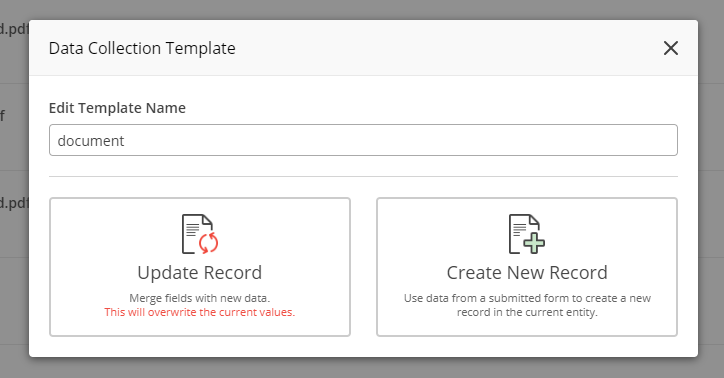
- Alternatively, select Create New Record to create a new record in the current object using data from a filled form.
- Your document opens in the PDF editor.
Drag and drop the necessary fillable fields such as dropdown fields, date fields, text fields, etc., from the box on the right your document. Only fields that have a blue mark can be connected to Dynamics 365 objects.
Make sure that the Select Field Source toggle under the field menu is set on Dynamics for all field types.
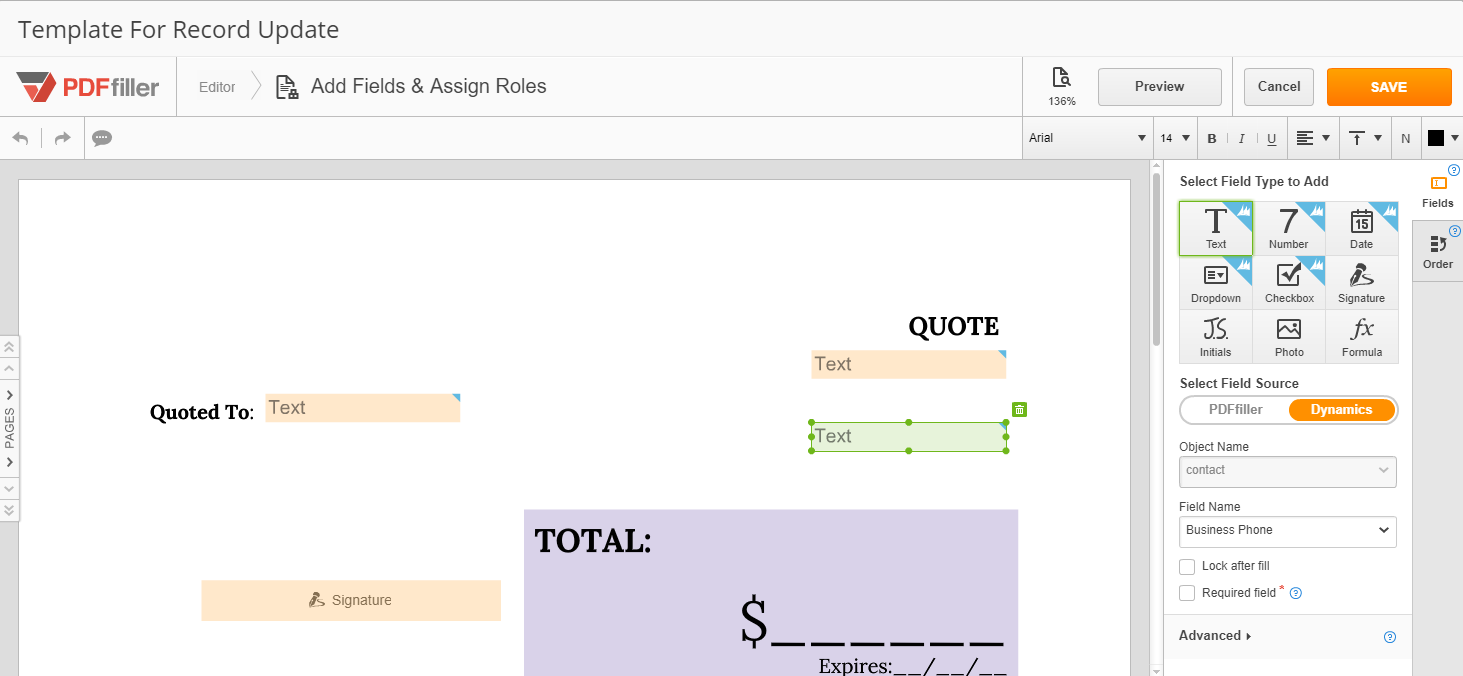
- Map the fields in the document with the Dynamics 365 record.
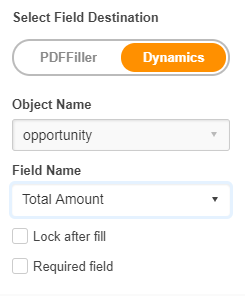
Click on any field in the document. Select a Dynamics 365 object and a field from it in the dropdowns under Select Field Destination. This way you’ll map the fillable field on the document with the field in the object.
Mapping enables data transferring between fields: you can either prefill a document with data from Dynamics 365, or use the data provided in that field on the document by a customer to create or update a record in Dynamics 365.
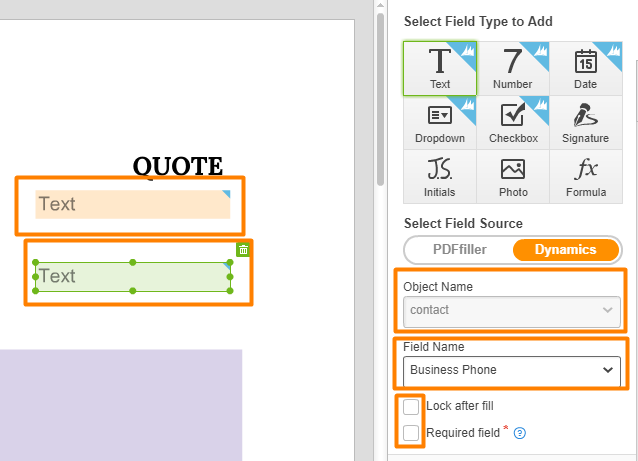
When creating your Data Collection Template (intended for updating an existing object), you can lock fillable fields after they’ve been filled with Dynamics data by checking the Lock after fill box. Doing so ensures that data added to these fields cannot be changed after the form has been submitted.
- When done, click Save.

Note that when making a template intended to Create New Record, some field types may need to be added, depending on the record type. If all of the required fields have not been added, you will be notified with a pop-up informing you that the form cannot be completed. Click OK and return to adding the required fields.
Once your Data Collection Template is properly set, click Save.
That’s it! Now your Data Collection Template is created and located in the Data Collection tab. It will be marked with a color tag according to its purpose, access permissions, and source.
Updated less than a minute ago
